
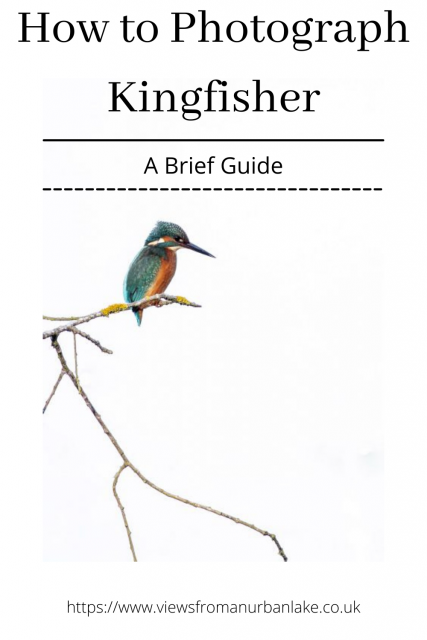
How to Photograph Kingfisher – a guide to these gems
It is often a dream of many bird watchers to see a Kingfisher, the flash of blue, the stunning oranges, they are truly a dream bird for many. The same can often be said of wildlife photographers. And so this is my guide on how to photograph Kingfisher. I hope it helps some of you achieve your dream.

How to Photograph Kingfisher – a warning
Firstly let me start off with a warning. Kingfisher are a Schedule 1 protected species. This means that disturbing the birds at or near a nest site is against the law, without a license.
DO NOT DO IT!
Now there are various ways to interpret this rule, and you can find some great advice here: Understanding Schedule 1 Licenses for Bird Photography Please go and have a read if you plan photographing Kingfishers in the summer.
But my advice is simple, if you know there are Kingfisher breeding near by move somewhere else. There really is no excuse to put a bird at harm just for a photograph.
Now on to the information you are looking for.
How to Photograph Kingfisher – Location is key
Birds can turn up anywhere, Kingfisher are no different. You will find them on lakes, rivers, garden ponds, tiny ditches in the middle of town. Really. Anywhere is possible. But the key to photographing them is to know regular fishing locations. And this will take some footwork on your behalf.
If you have a local Kingfisher then it is worth studying their behaviour. Watch flight routes. Study fishing locations. Time appearances. Watching and learning will show you where to set up. And when. Does the bird return to the same perch often? Does it eat where it catches? Is it easily spooked by people? Local Dogs? Are there times when the location is busier and there is less chance to see the bird?
Knowing a spot that kingfishers regularly visit to fish from, or perch will make taking their photo that much easier. Knowing when the area is quietest will help avoid disturbance by others.
Scout Locations
Scouting a location in advance of a photography session will also allow you to look for the type of background you want. A beautiful clean background that allows the Kingfisher to “pop” can be great, but isn’t always what you are looking for.

But even when you find the perfect place, it is not always easy to get the shot.
Patience the photographers virtue
Kingfisher photography is really just about luck….
No not really, what it takes is time to catch that great shot. Time and patience. In my own efforts to photograph Kingfisher I have spent hours in the same hide waiting. This is a hide where Kingfishers are seen very regularly, but it still took me over 12 hours spread out over three days (and a couple of weeks) to get “that” shot. I know others who have spent much longer waiting in one place for one split seconds visit; or visited the same location many times over just to sit and wait for the bird to come in and the photo opportunity to present itself. Kingfisher photography is not a quick task.
The ability to sit still and wait is something you WILL need to learn if you want to take great photographs. And not just of kingfishers. Birds of all species are easily spooked by quick movement. Slow steady motion is your goal in wildlife photography.

Some form of hide will help in your wait, be it a commercial hide, one at the local nature reserve, or your own portable hide. I have a bag hide (I really should use more). Something to disguise your presence will make the photo a little easier (assuming you have the location).
Patience really is needed if you want great Kingfisher photographs.
The Importance of Light
Kingfishers often move fast, so finding a location that a kingfisher perches that is shrouded in shade will make things more difficult; although not impossible. An open branch that natural sunlight hits will help, and make for a brighter image.
That said they can stay very still, especially while watching the water, so bright areas, and fast shutter speeds are not always a prerequisite for a great photograph.

Action shots
Of course it is not just about “Bird on a stick photography” capturing a kingfisher in action can make for a wonderful photo. Knowing their feeding spots allows you to potentially get that diving shot (Personally I have yet to capture a diving bird well); and flight shots can be wonderful too, if tricky. Kingfisher don’t half move fast.
How to Photograph Kingfisher – Kit List
I’m sure there will be people who want to know what kit they need to take the photos, or what settings they should use, but I don’t think this is as important as knowledge. There are a few obvious things you will need. A camera (SLR or Mirrorless is probably best, but I have seen some lovely photos with bridge cameras); A long lens (300mm or above realistically); A tripod, for stability. But what you have is what will work.
That said I use the following in my photography
2021 Kit (old):
- Canon 70D SLR
- Canon 400mm f/5.6
- Tripod
- Bag hide
2022 Kit:
- Sony A7iii
- Sony 200-600mm f/6.1
- Tripod
- Bag hide
- Walkstool
How to Photograph Kingfisher – Settings
As for settings, Well I say this every time. Your settings will be dictated by the light and surroundings of the day. I usually photograph kingfishers in the same way I do other birds. I use Aperture priority, usually set one or two stops up from the fastest (depending on light) on my 400mm lens that is 6.3 or 7.1 on the Sony it is f/7.1 or f/8.0 as they are the lens “sweet spot”. My ISO will be determined by the speed I need, but I prefer to keep it as low as I can to reduce noise. That said the Sony handles low light well. And my shutter is usually set to be no slower than 1/250 ideally much quicker though.
The great thing with perched Kingfisher is that they stay pretty still. This does allow for a slower shutter speed at times.
If I am trying to capture a Kingfisher in flight or barter yet diving, then I will go for speed over anything. Push up the shutter speed, increase the ISO (noise is a preference over missing a shot, and is often not noticeable in prints). If you have to then drop the Aperture as well.

Thank you for reading
Please feel free to share “How to Photograph Kingfisher” with anyone you think may find it useful. And if it has gone some way to help you get a shot I’d love to hear from you, drop a comment below.
A number of the photos on this page can be purchased from Urban Lake Photography In various sizes and formats. And don’t forget I have other how to shoot type tutorials on here as well. Make sure to take a look at them too.


2 Comments
Jimmy Lee Wolfd
Thank you very much. It was really helpful. I just spotted one today and I want to return with my camera early in the morning.
Ashley Beolens
That’s awesome, such wonderful birds to see